Photo gallery
Product
Find images by browsing the photo gallery by category. Add them to your Pinterest boards. Access the press kit to download the image or view project details.
Create a media account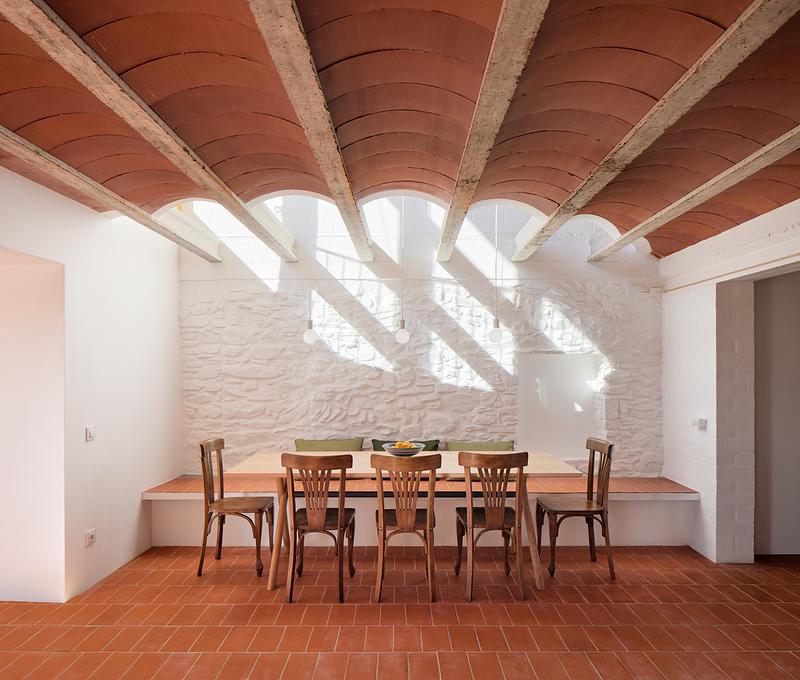
"Dream in Progress": The New Book About the Architecture of Travel with Outstanding Hotels and Holiday Homes
URLAUBSARCHITEKTUR
Ca la Carolina (ES) by Lacol & Altura Arquitectes
Photo credit:
Pol Viladoms
"Dream in Progress": The New Book About the Architecture of Travel with Outstanding Hotels and Holiday Homes
URLAUBSARCHITEKTUR
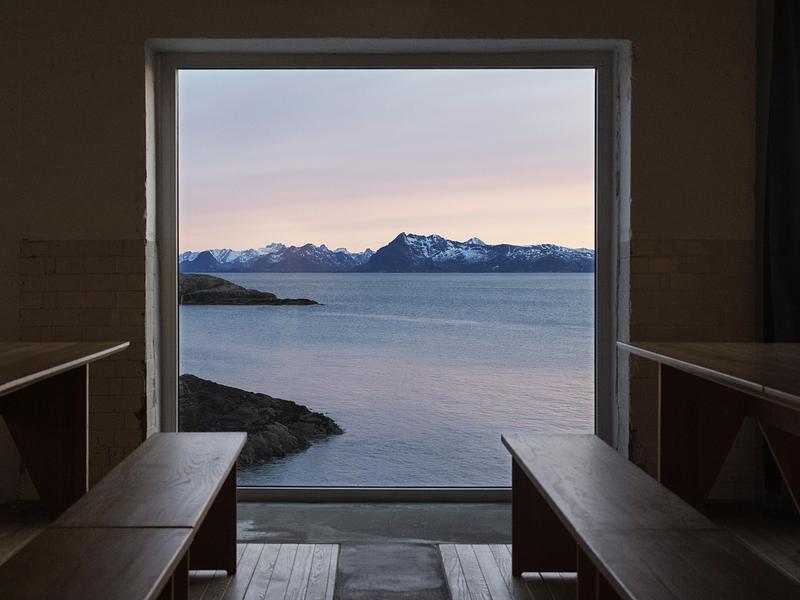
Trevarefabrikken (NO) by Tuckey Design Studio
Photo credit:
Andrea Gjestvang
"Dream in Progress": The New Book About the Architecture of Travel with Outstanding Hotels and Holiday Homes
URLAUBSARCHITEKTUR
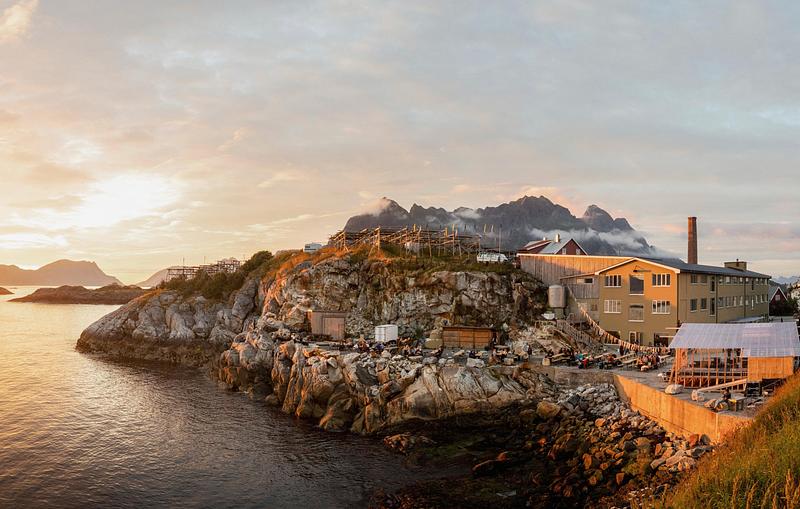
Trevarefabrikken (NO) by Tuckey Design Studio
Photo credit:
Andrea Gjestvang

"Dream in Progress": The New Book About the Architecture of Travel with Outstanding Hotels and Holiday Homes
URLAUBSARCHITEKTUR
Trevarefabrikken (NO) by Tuckey Design Studio
Photo credit:
Andrea Gjestvang
"Dream in Progress": The New Book About the Architecture of Travel with Outstanding Hotels and Holiday Homes
URLAUBSARCHITEKTUR
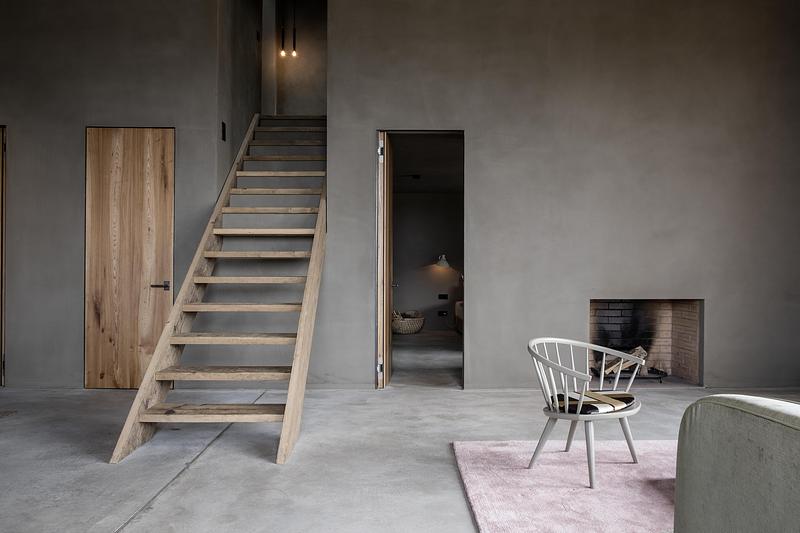
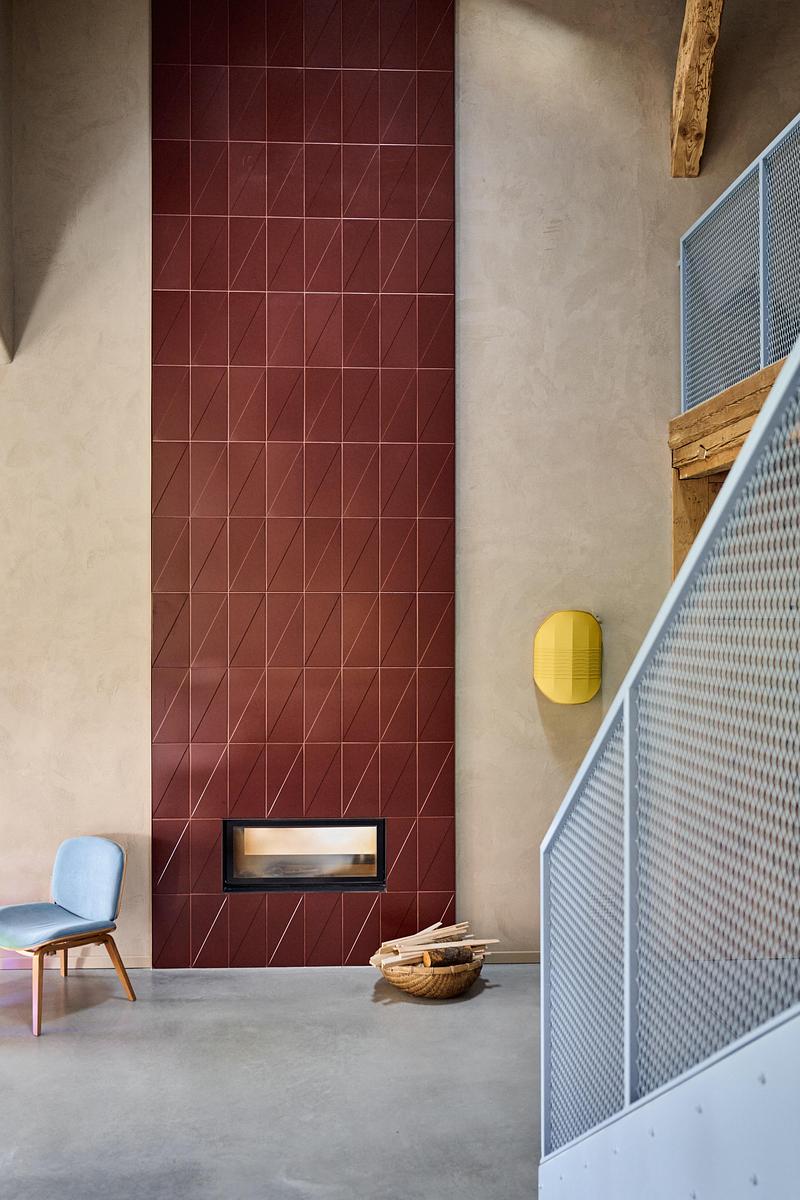
Die Scheune (DE) by Stephanie Thatenhorst
Photo credit:
Kerstin Weidemeyer
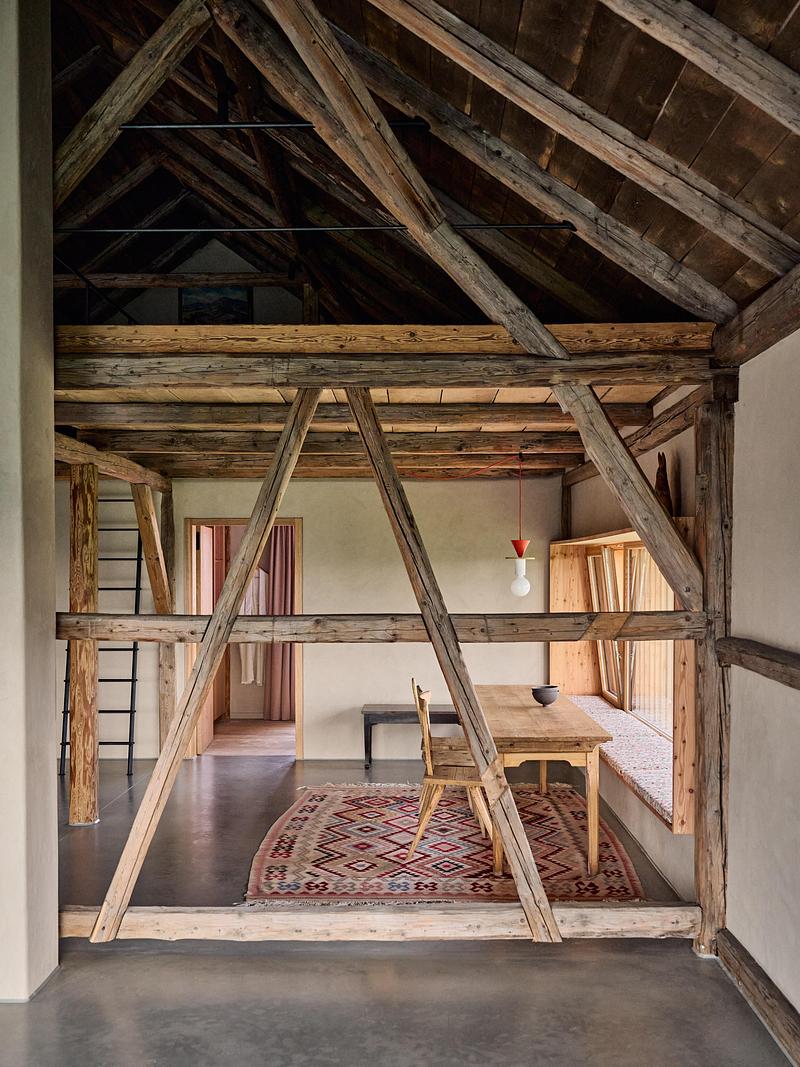
"Dream in Progress": The New Book About the Architecture of Travel with Outstanding Hotels and Holiday Homes
URLAUBSARCHITEKTUR
Ebenrieder (DE) by Stephanie Thatenhorst
Photo credit:
Daniel Schäfer
"Dream in Progress": The New Book About the Architecture of Travel with Outstanding Hotels and Holiday Homes
URLAUBSARCHITEKTUR
Ebenrieder (DE) by Stephanie Thatenhorst
Photo credit:
Daniel Schäfer
"Dream in Progress": The New Book About the Architecture of Travel with Outstanding Hotels and Holiday Homes
URLAUBSARCHITEKTUR
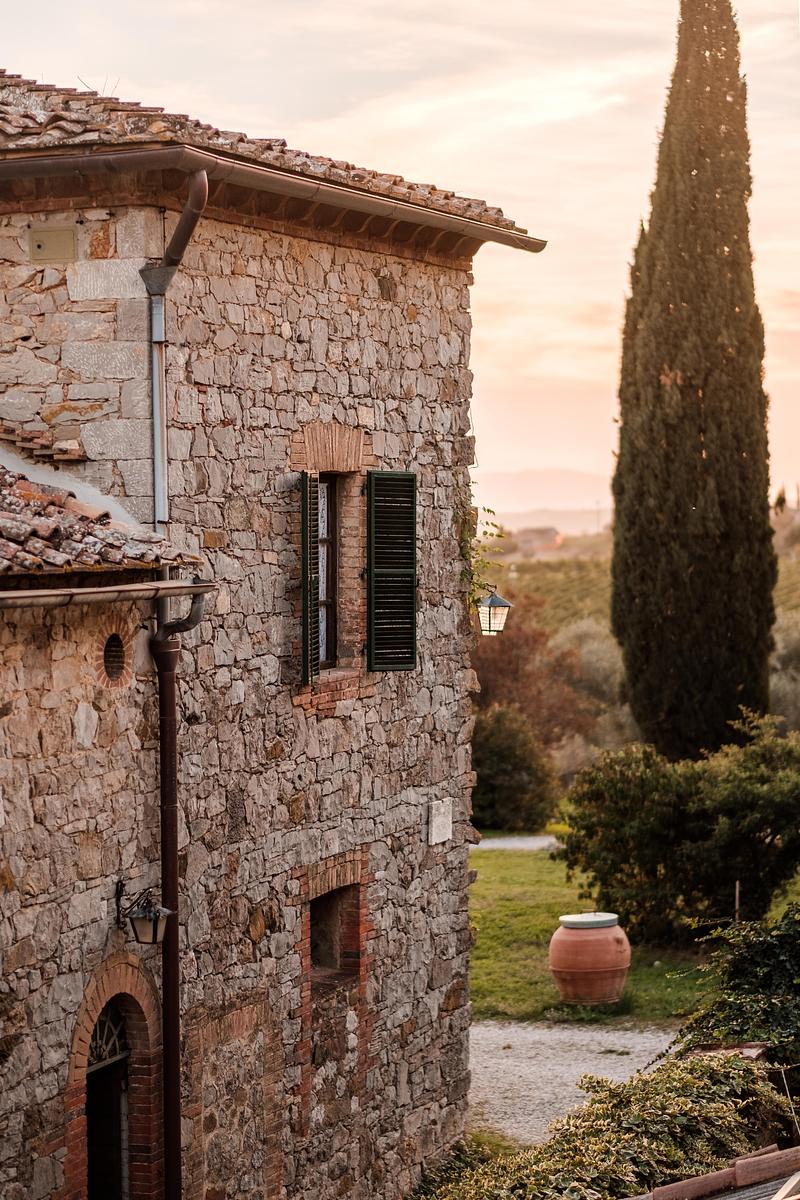
Colle ai Lecci (IT) by Nina Mair & Ana Turcan
Photo credit:
Ana Turcan
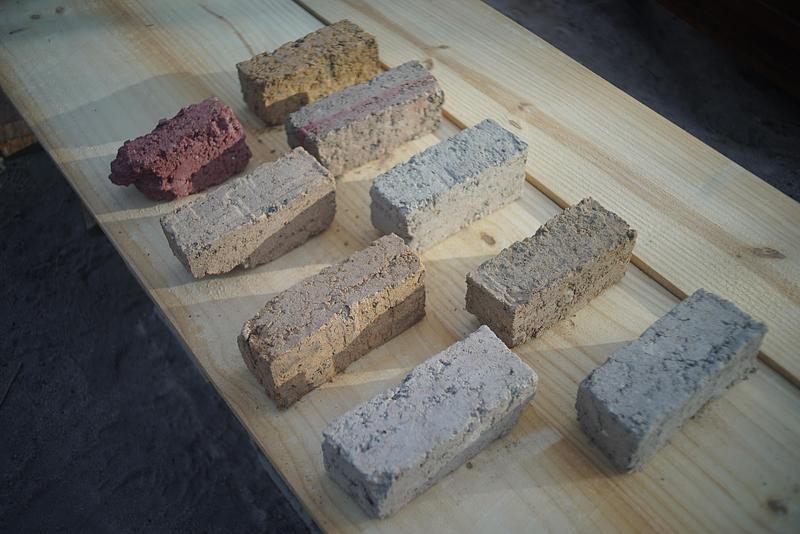
"Dream in Progress": The New Book About the Architecture of Travel with Outstanding Hotels and Holiday Homes
URLAUBSARCHITEKTUR
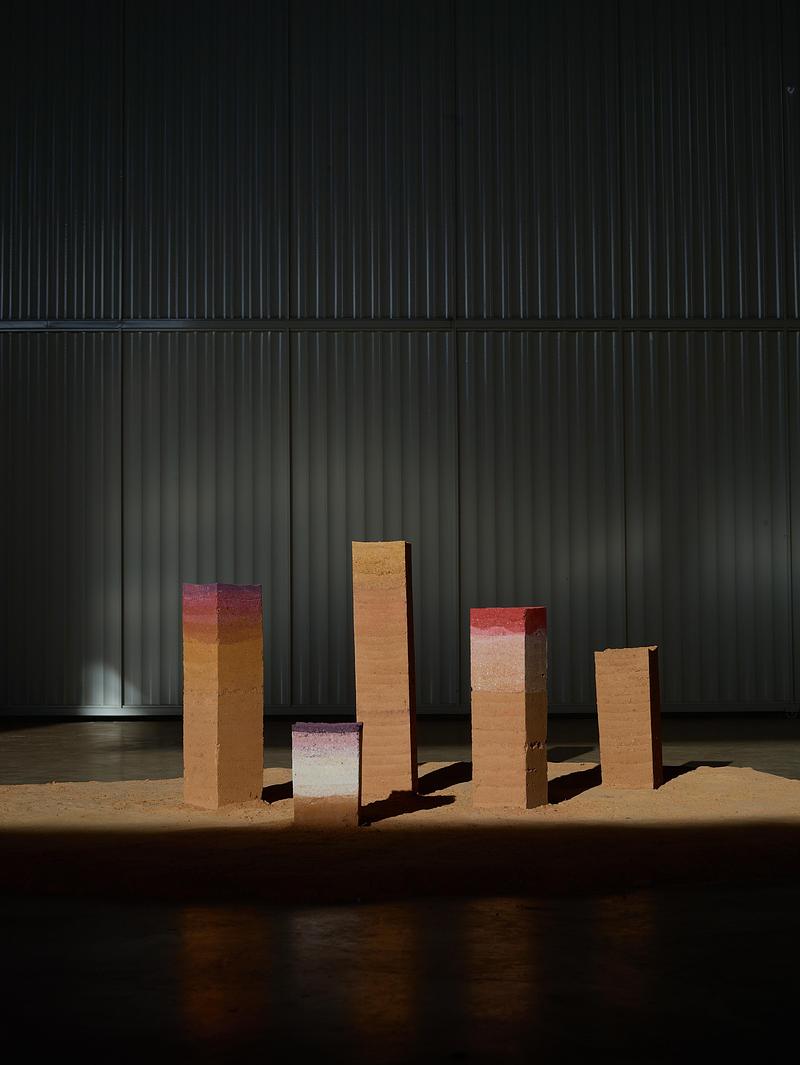
Clay workshop by CLAYA at Colle ai Lecci
Photo credit:
Luis Casanova Sorolla
"Dream in Progress": The New Book About the Architecture of Travel with Outstanding Hotels and Holiday Homes
URLAUBSARCHITEKTUR
Clay workshop by CLAYA at Colle ai Lecci
Photo credit:
Luis Casanova Sorolla

Advertising
"Dream in Progress": The New Book About the Architecture of Travel with Outstanding Hotels and Holiday Homes
URLAUBSARCHITEKTUR
The El Paso (ES) by ambits
Photo credit:
Francisco Soares
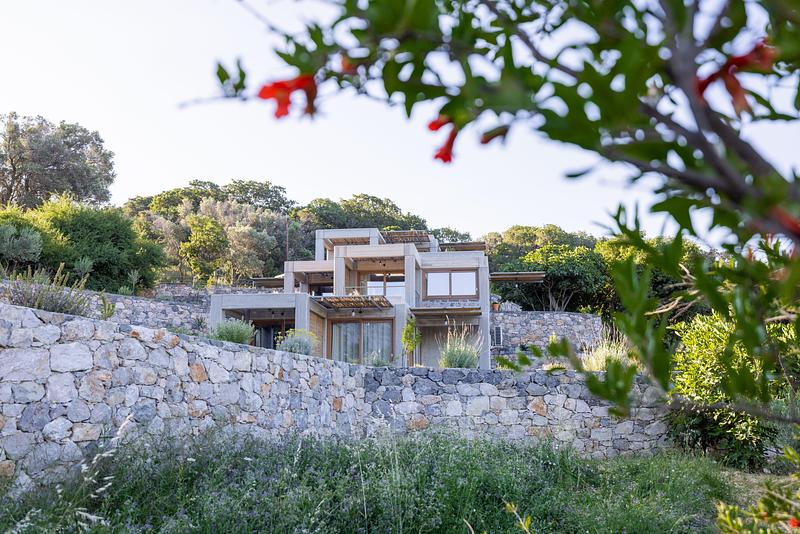
"Dream in Progress": The New Book About the Architecture of Travel with Outstanding Hotels and Holiday Homes
URLAUBSARCHITEKTUR
Meraki Studios (GR) by Sigurd Larsen
Photo credit:
Leo Jaerisch aka ZOLEO
"Dream in Progress": The New Book About the Architecture of Travel with Outstanding Hotels and Holiday Homes
URLAUBSARCHITEKTUR
Meraki Studios (GR) by Sigurd Larsen
Photo credit:
Zoamee-Mathie Knoche aka ZOLEO

"Dream in Progress": The New Book About the Architecture of Travel with Outstanding Hotels and Holiday Homes
URLAUBSARCHITEKTUR
Meraki Studios (GR) by Sigurd Larsen
Photo credit:
Leo Jaerisch aka ZOLEO
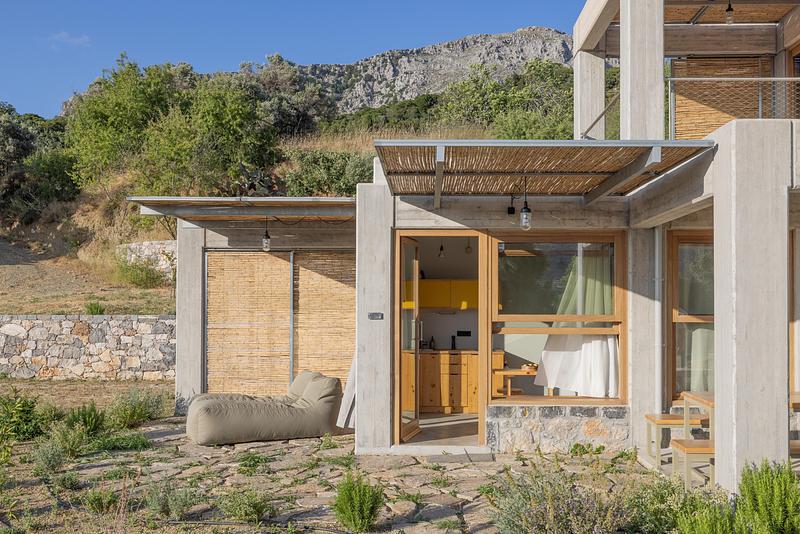
"Dream in Progress": The New Book About the Architecture of Travel with Outstanding Hotels and Holiday Homes
URLAUBSARCHITEKTUR
Fowlescombe Farm(UK) by Paul Glade, Harry Gugger, Ryan Cook
Photo credit:
Jon Tonks
"Dream in Progress": The New Book About the Architecture of Travel with Outstanding Hotels and Holiday Homes
URLAUBSARCHITEKTUR
La Ferme de Brouage (FR) by lsl architects
Photo credit:
Antoine Leveque
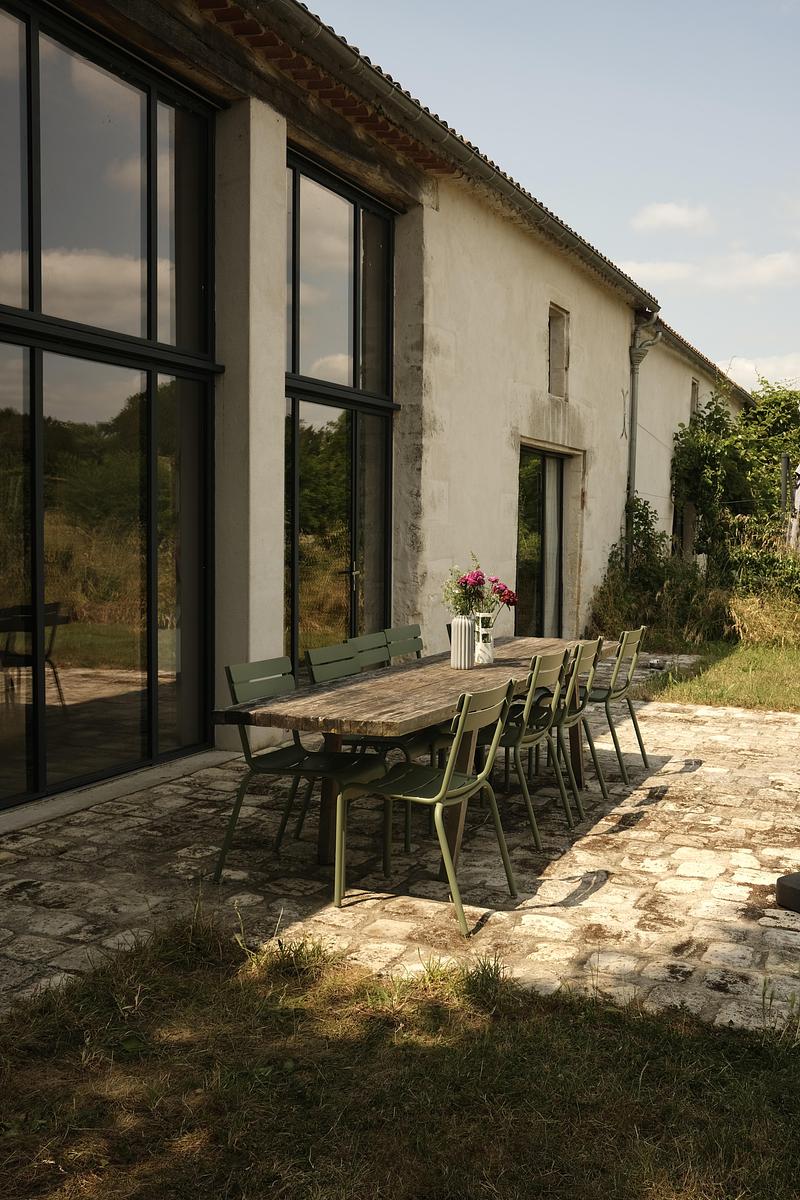
"Dream in Progress": The New Book About the Architecture of Travel with Outstanding Hotels and Holiday Homes
URLAUBSARCHITEKTUR
La Ferme de Brouage (FR) by lsl architects
Photo credit:
Antoine Leveque
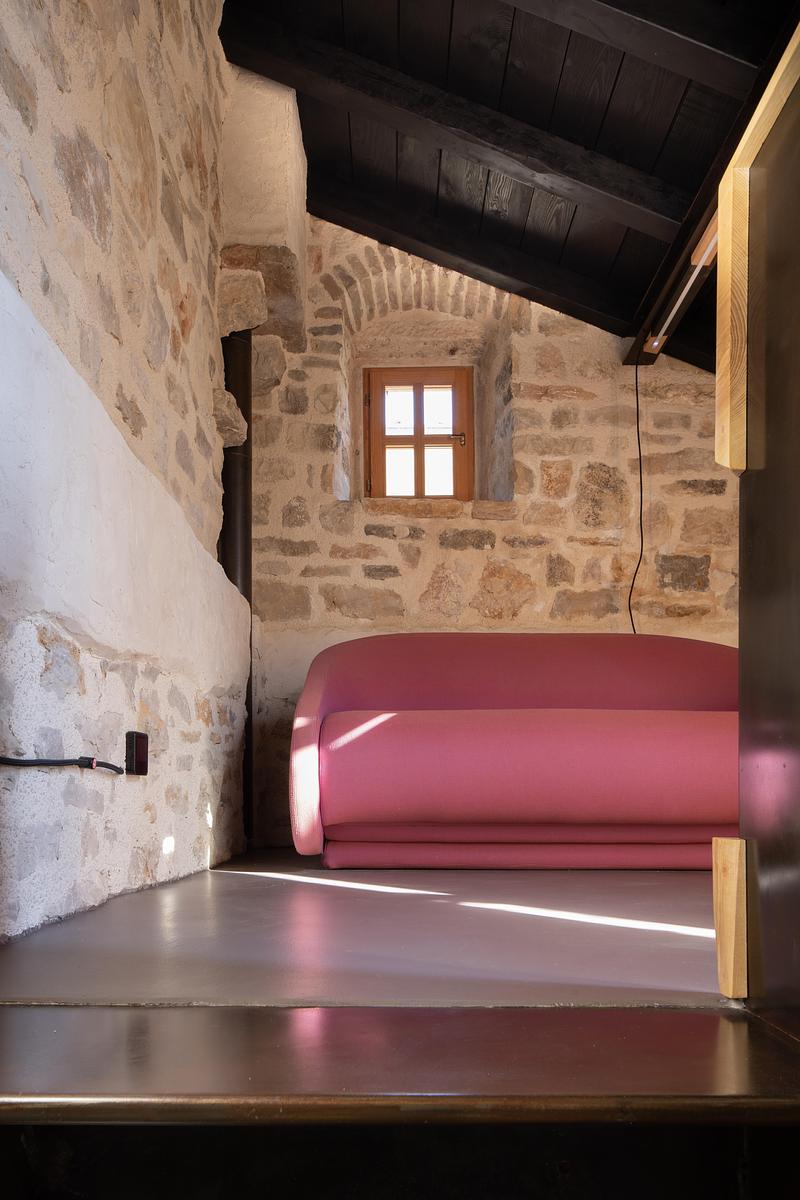
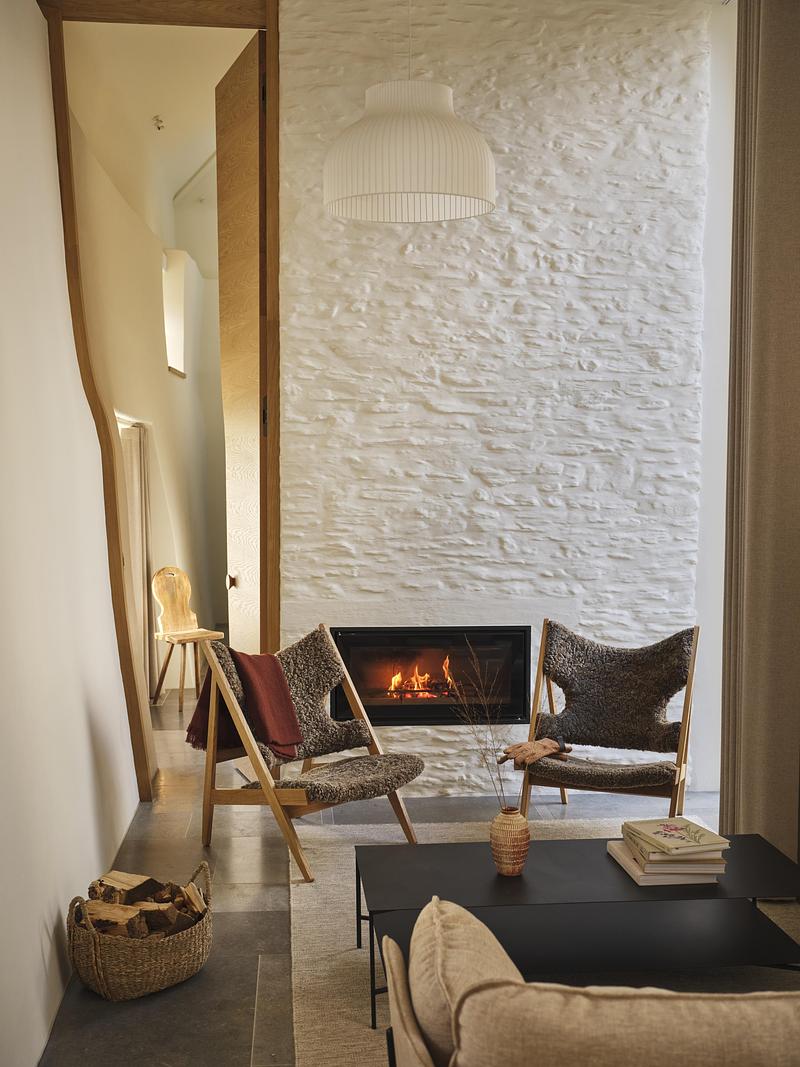
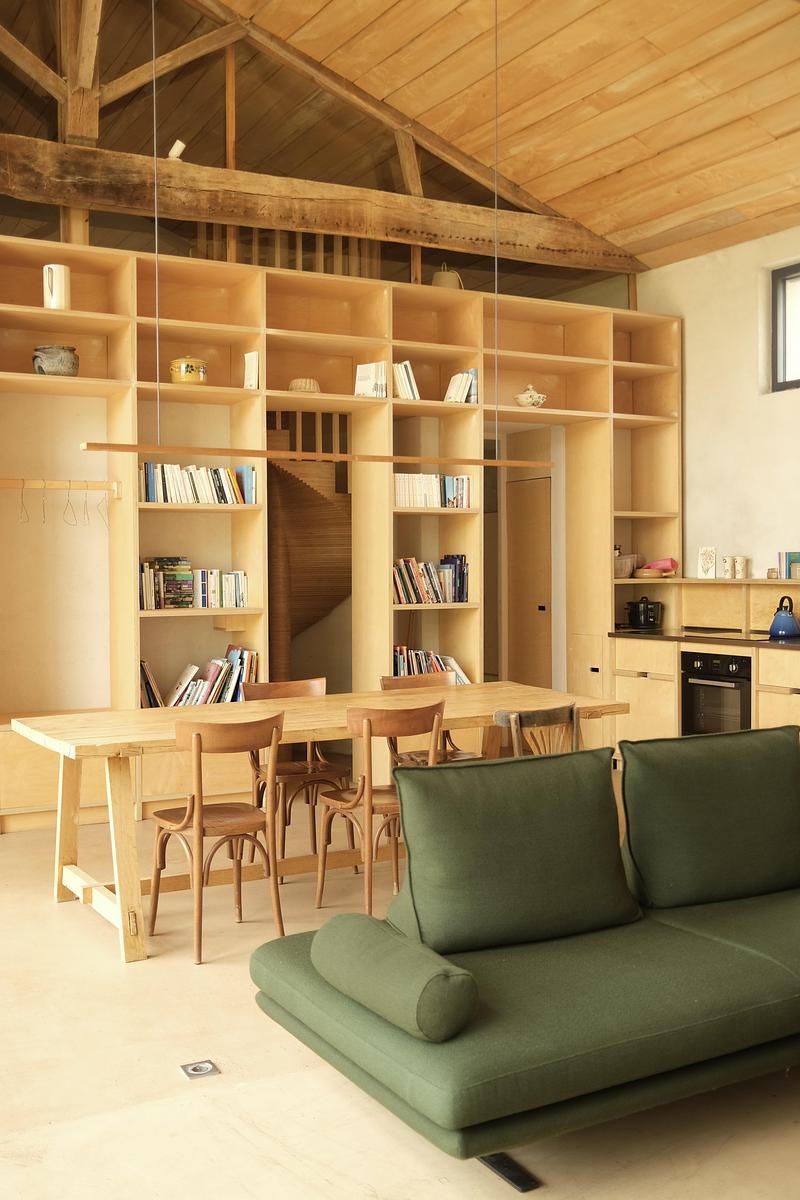
"Dream in Progress": The New Book About the Architecture of Travel with Outstanding Hotels and Holiday Homes
URLAUBSARCHITEKTUR
Kuća Skala (HR) by Boris Kajmak
Photo credit:
Tom de Gay
"Dream in Progress": The New Book About the Architecture of Travel with Outstanding Hotels and Holiday Homes
URLAUBSARCHITEKTUR
Kuća Skala (HR) by Boris Kajmak
Photo credit:
Tom de Gay

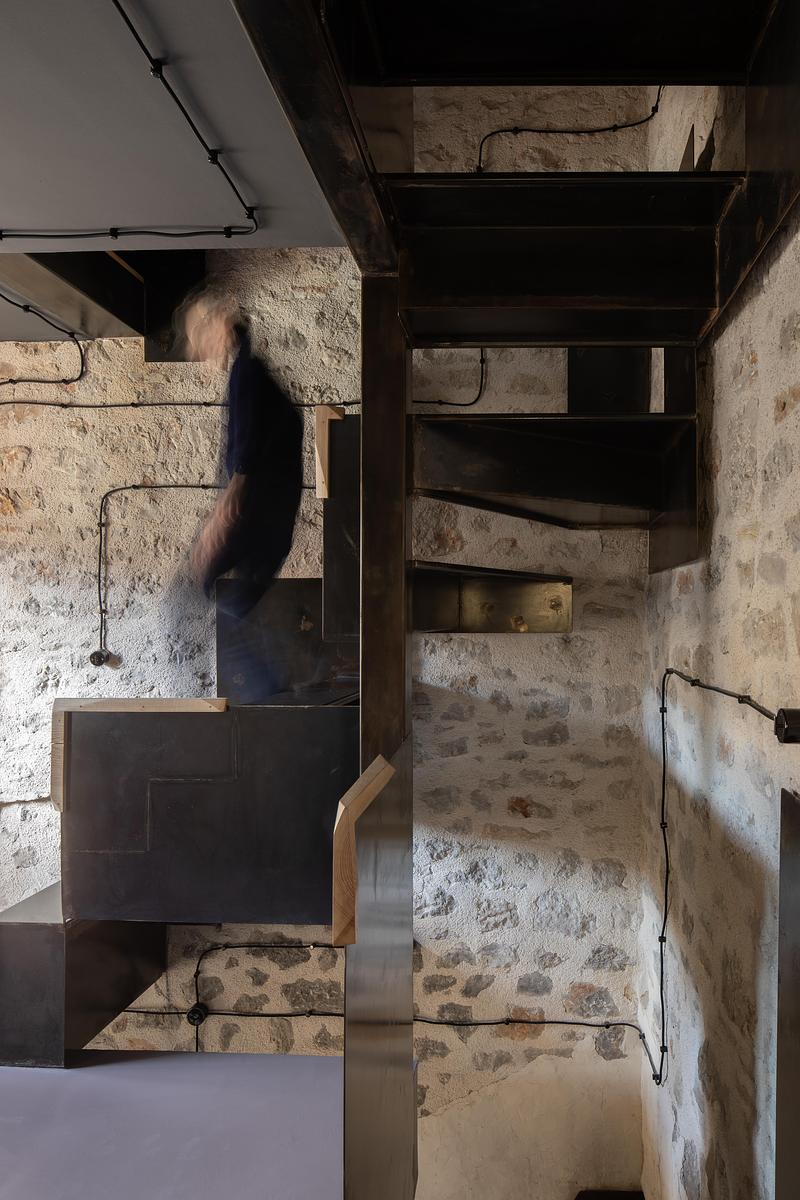
"Dream in Progress": The New Book About the Architecture of Travel with Outstanding Hotels and Holiday Homes
URLAUBSARCHITEKTUR
Johannes Neun (DE) by Sandra Glados
Photo credit:
Katrin Kaiser
Advertising